 Translate


NOTICE
The Development Direct permitting system for Building Codes, Septic and Development Engineering will be offline from:
8 a.m., Tuesday, April 22 until 8 a.m., Thursday, April 24;
During this time there will be no access to the following online services:
- submitting applications,
- reviewing projects,
- paying permit fees,
- accessing approved plans, or
- purchasing trade permits (trade permits will still be available for purchase in-person and by email)
All services will resume by 8 a.m., Thursday, April 24.
The downtime is required for needed changes to the system to increase the efficiency of our service to the public. We apologize for any inconvenience and thank you for your understanding. Questions? Call 503-742-4400 or email dtdcustomerinfo@clackamas.us.
Use Development Direct to apply for...
- All Development Engineering permits, including:
- Development Permits
- Entrance Permits (Driveway)
- Right of Way Permits
- Utility Permits
- All Building, Electrical, Plumbing and Mechanical permits that require a plan review
- Licensed contractor Electrical, Plumbing and Mechanical permits that do not require a plan review
- All Septic projects (except operation and maintenance reports)

Instructions to submit using Development Direct
You must use the Chrome or Firefox browser to access Development Direct.
The following permits DO NOT require submission through Development Direct…
- Basic Homeowner Electrical, Plumbing and Mechanical permits on your own residence or home-based business that do not require plan review
- Planning/Land Use permits
To learn more and apply for these permits
Visit How To Apply for a Permit
Helpful Tips
- Step by step instructions for the review process are provided below. To submit an application, see steps 1–4.
- It's important to prepare your drawings before you start an application. See step #1 below for details.
- Development Direct will communicate with you by email. System-generated emails that you receive will come from donotreplyCLOR@avolvesoftware.com.
Not sure where to begin? Contact us.
Using Development Direct
The guidelines below will help you prepare the project drawings and documents needed to submit your application.
Drawings are larger format sheets used for construction (for example: site plans, floor plans, detail sheets, general notes). Documents are supplemental information typically in an 8 ½ x 11 format (for example: calculations, product information, reports).
Before you start, it’s important to know.
- All drawings and documents must be PDF files.
- If you need help scanning your drawings, a local print shop may be able to help.
- All drawings and documents must following the naming conventions provided below.
- For drawings, each sheet will be uploaded as a single file.
Drawing requirements
- All drawing must be PDF files, with searchable or vector PDF files preferred.
- Each page or sheet of a drawing file must be uploaded to Development Direct as a separate file
If your drawing is a multi-page PDF file, there are many websites and videos available on the internet to guide you through the steps of splitting your PDF files. Each sheet/page of a drawing must have the page orientation set to landscape.

landscape
portrait- All plans must be drawn to scale, with the scale clearly labeled on the drawing.
Naming conventions for drawing files
All drawing files must follow the naming conventions to ensure that they are listed in the proper order when uploaded. When naming drawings:
- The names are based on the order of the sheets in your drawings set. They must be named and uploaded in this order.
- Please limit the number of characters in a file name to 35 or less; abbreviations are acceptable.
- Do not include dashes (-) or other special characters (such as &, %, #) in the file name.
Important: If you are asked to correct and resubmit a file, do not rename it (for example, add a version number). You must use the original file name or it will not be accepted. Once it is uploaded, the file will automatically be assigned a version number.
The naming convention starts with a number showing the drawing’s position in the overall set of drawings, followed by a description based upon the information provided on the drawing page. For example, if these are the first 3 drawing in your drawing set:
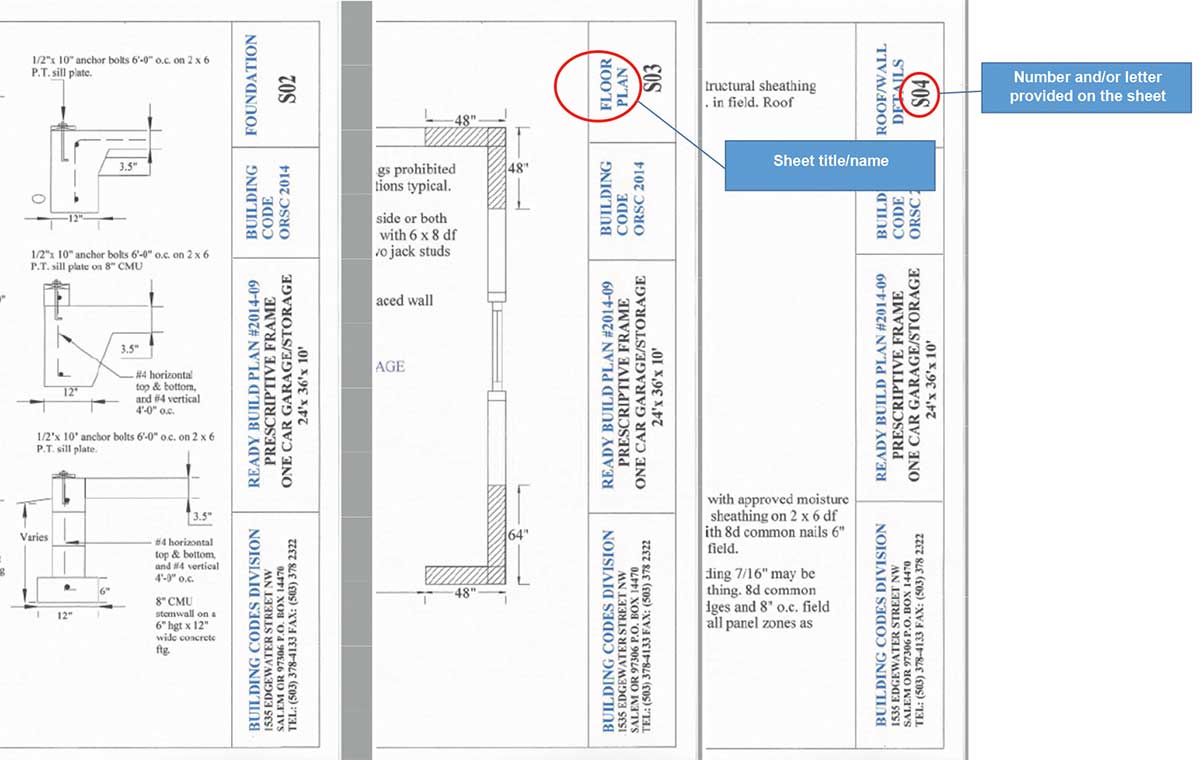
The drawings would be named as follows:
3-digit number showing drawing’s order in the set + (space) + Number and/or letter provided on the sheet + (space) + Sheet Title/Name = File Name
Examples:
- 001 + (space) + S02 + (space) + Foundation = 001 S02 Foundation
- 002 + (space) + S03 + (space) + Floor Plan = 002 S03 Floor Plan
- 003 + (space) + S04 + (space) + Roof Wall Details = 003 S04 Roof Wall Details
Document requirements
- Documents (such as certifications, easement letters, Geotechnical reports, or structural calculations) are project elements that are not drawing files.
- Each document should be uploaded as a separate complete document (multiple page documents are allowed), but not as individual sheets.
- All documents must be PDF files.
Naming conventions for document files
- Document file names should describe the contents of the file. Because they do not need to be in a defined order, you do not need to start the file name with a number.
- Please limit the number of characters in a file name to 35 or less; abbreviations are acceptable.
- Do not include dashes [-] or other special characters (such as &, %, #) in the file name.
Examples:
- Structural Calculations 1234 Main St Project
- Product Information Sheet for Sump Pump
- Existing System Evaluation Report
To apply for a permit and submit documents for review, you need to create an account.
- If you have pop-up blockers turned on, you will need to disable them for the Development Direct website. Doing this will allow the log-in page to appear when you sign in.
- Go to Development Direct and click the “Create Account” button
- Fill in all necessary information and click “Create My Account”
- A pop-up window will open asking for a verification code.
- You will get the verification code via email. Enter this code in the pop-up window and click “continue”
- When done, a message will appear letting you know your account was successfully created
When you are ready to apply for a permit, you must submit a completed application
- Once you have created an account, log in to Development Direct using the email address and password you used to set up your account.
- Please note that the roles assigned to project participants in the application process have specific meanings, with not all roles allowed to do the same tasks. Before starting the application, carefully consider who you assign to serve in the following roles as part of your project:
- Submitter
The submitter is the currently logged in user, who is either the property owner or an authorized representative of the property owner. Septic only - *If an authorized representative is completing the application, a signed Authorizing Representative form will need to be uploaded as part of the submittal. - Applicant
The applicant is the only person who will be notified by email to upload files, who can make payments and who can respond to correction requests during the application review process. - Construction Point of Contact
This person is responsible for answering construction/inspection-related questions after a permit has been issued. (Typically, this is the project contractor).
- Submitter
On the portal page, based upon the type of permit you need, begin applying for a permit by selecting one of the following:
The permits available on Development Direct are listed below.
Building Permits
(plan review required)- Agricultural Exemption
- Building
- Building Permit Revisions
- Electrical
- Manufactured Dwelling
- Mechanical
- Plumbing
Development Engineering Permits
(plan review required)- Development
- Entrance
- Right of Way
- Utility
Septic Submittals
(staff review required)- Authorization Notices
- Site Evaluations
- Construction & Repair Permits
- Existing System Verifications
- Pumper Truck Inspections
Need another type of permit? Check our How To Guide for assistance.
Use the dropdown menu to choose the type of permit or application you need. Assign a project name to your application in the name box.
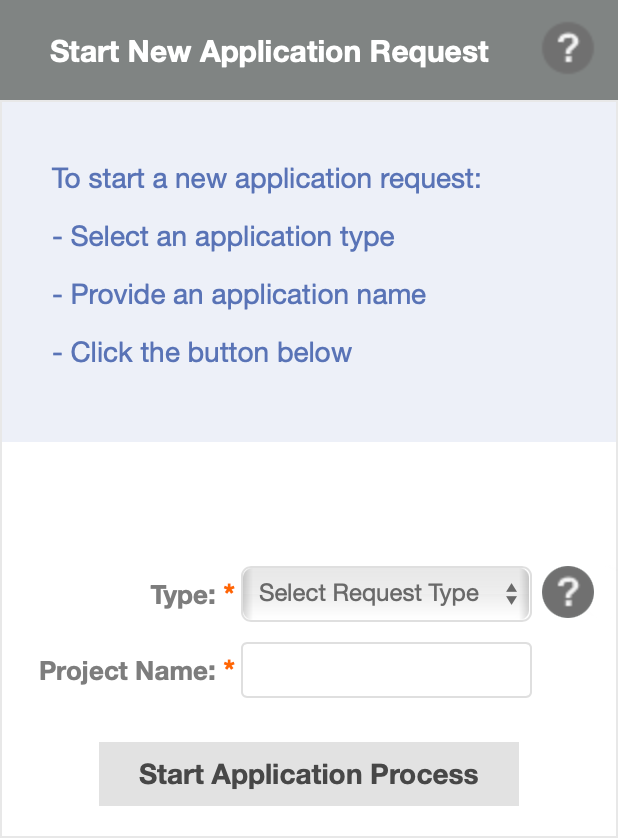
Note: All project names are limited to 100 characters or less.
When naming the project the following is recommended:
- Building applications
Use the site address, followed by the type of work.
Example: 5607 SE FOREST DR - New Construction. - Development Engineering Applications
Use the project title, plus the description or road name.
Example: Smith Partition — two lots
Example: Smith Partition – Johnson Road - Septic applications
Use the site address followed by the type of work.
Example: 5607 SE FOREST DR – Major Repair Permit
Example: 32E05C 00812 – Site Evaluation
- Building applications
Select
 and you will be walked through the application process.
Note: While completing the application, watch the section headers on the right side to see if each section is complete or incomplete. If you cannot submit your application, go back and make sure each section is marked as complete.
After your application has been processed, you will receive an Upload and Submit message with a link to upload your project documents in Development Direct.
To help your project move through the process quickly, please make sure that you upload your project drawings and documents correctly.
- Drawing sheets
- Upload into the drawing folder.
Upload in landscape (horizontal) orientation.
landscape
portrait- Upload each sheet as a single file.
- All drawings must be PDF.
- Use the drawing file naming conventions shown in Step 1 above.
- Documents (reports, calculations, etc.)
- Upload into the documents folder.
- Upload all documents as one complete document or packet, not as individual pages.
- Documents must be in a PDF format.
- You must use the document file naming conventions shown in Step #1 above.
- Remember to complete your task when you are done uploading all your drawings and documents.
You may want to allow others to participate in your project (for example, a co-worker, partner or architect). If you choose to do this, you can assign permissions to each individual.
To invite someone as a project participant:
- Select the Invite Others tab located near the top of the Upload and Submit form.
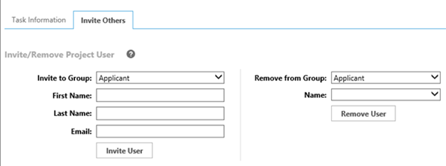
- At Invite to Group, select one of the following:
- Applicant
An Applicant can view previously uploaded files, comment on, and complete tasks.- Note: You can add as many Applicants as you like, but the first applicant to accept a task is the only one who can work on it.
- View Only Applicant
A View Only Applicant can only view previously uploaded files. You can add as many View Only Applicants as you like.
- Applicant
- Enter the name and email address of the individual to invite.
- When finished, select Invite User.
After your files are submitted, our staff will begin the Prescreen Review process to check the drawings and documents provided for the project.
After we review your files, you will receive a system-generated email and be notified in Development Direct about the status of your application.
- If all requirements of the Prescreen Review were met, you will receive a Prescreen Completed email.
- If additional information is needed, you will receive a Prescreen Corrections email. See Step 9 below for how to respond to requests for additional information.
If fees are required for your project, they must be paid before your application is complete. There are 3 ways you can pay fees. (Note: The fastest way to move forward with your permit is to pay through your Development Direct account.)
| Online Payments (Credit/debit card) | We accept credit and debit card payment through Visa, MasterCard and Discover Card. Note: Bank service fees apply when using a credit/debit card.
|
| eCheck | ou can pay online through your Development Direct account with an electronic check (ACH payment). Note: Bank service fees apply when using eChecks. |
| Cash, In-Person Payments | You may pay with cash in-person, from 8 a.m. to 4 p.m., Monday through Thursday, at 150 Beavercreek Road, Oregon City map. Note: You will still need to submit your application materials online. |
Please note:
- Processing of your application will be paused until we receive funds.
- You will receive an email letting you know that the Plan Review process is underway once you have met all the submittal requirements, Prescreen Review is complete, and any necessary fees are paid.
Development Direct will be your go-to place to:
- check the status of your project;
- see if action is required from you to move the application forward, and
- when requested, upload additional items or information needed to complete the review for your project.
Note: You can check the status of your project at any time, but all reviews must be completed by Clackamas County staff for you to respond or upload documents to the system. Receiving a task is an indication that an action or a response is required from you.
To see a list of your projects and the status of each:
- Log in to Development Direct.
- At the bottom of the Clackamas County Development Direct Portal page, select
 .
.
The Projects list is displayed. (If you are on the Task tab, you will need to select Projects.)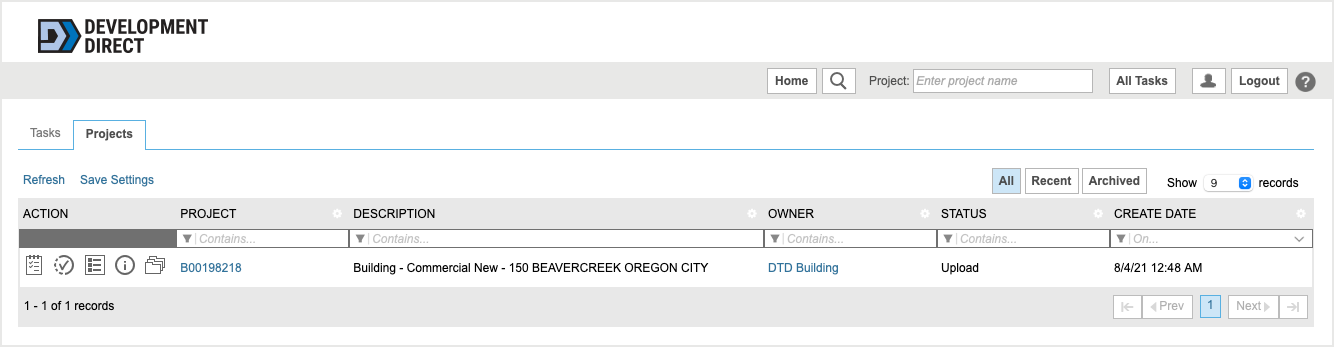
- If you don’t see a particular project, in the lower-right corner of the list, select
 or
or  .
. - The STATUS column indicates where your project is in the review process. You can also view additional status information by selecting the
 (Project status) button to the left of a project number.
A Status page displays more detailed information. - Option: To see the status of each project task, select
 at the bottom of the status page. The Plan Review – Workflow Routing Slip report will be displayed. When you are finished viewing the report, select
  (Close) in the upper-right corner.
 - To return to the Projects list, select
 near the top-center of the page.
Once all staff reviews of your project are complete, you will receive a system-generated email, and you will be notified in Development Direct, if corrections or additional information are required for your project. Required actions will be assigned to you as tasks. The email you receive will contain a link to begin the task.
- To begin the task, select
 in the email you received and log in to Development Direct; then click the ProjectDox banner. The Tasks list for your project is displayed.
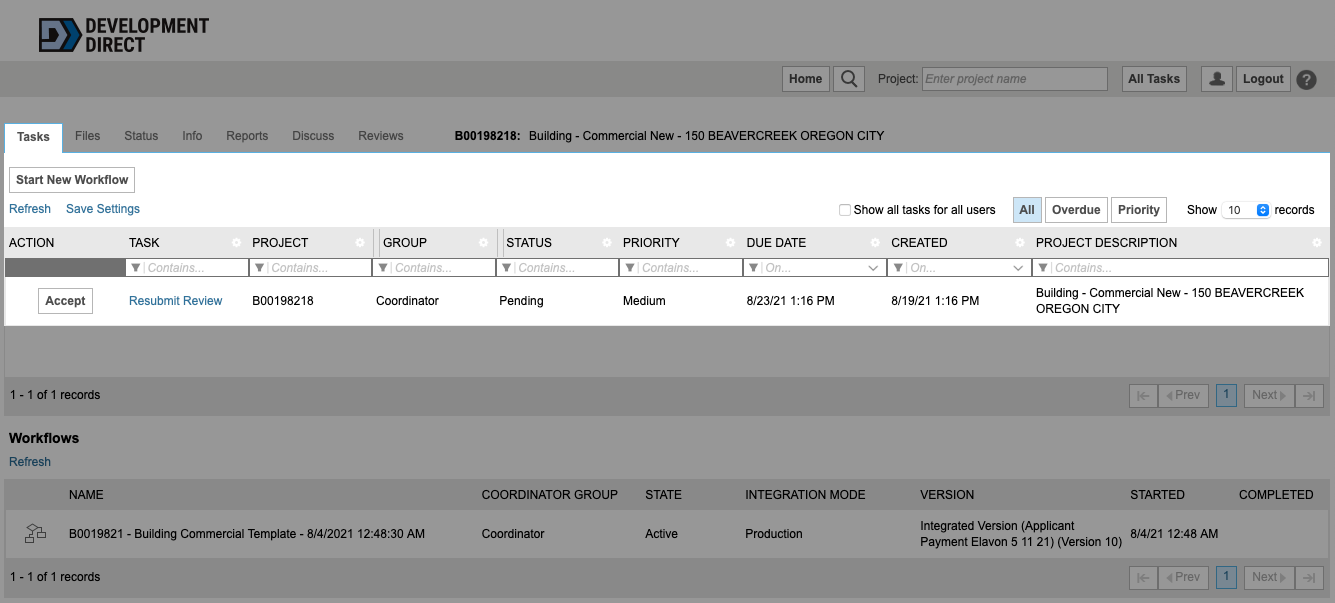
- In the TASK column, select your task.
(Note: Be sure to select the task name in the TASK column, and not the button in the ACTION column.) A pop-up window will be displayed with additional information.
Needed corrections will be identified in the form of a comment or a changemark.
- A comment is a text only remark,
- A changemark is a comment that is placed and marked directly on a drawing (site plan, cut sheet, etc.).
If a comment or changemark is labeled Correction required, it will be assigned to you as a task.
To review these comments: Select the ![]() box in the STEP 1 of 4 area of the pop-up window .
box in the STEP 1 of 4 area of the pop-up window .
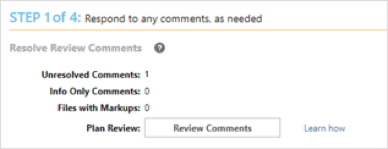
After selecting the Review Comments box, the comment list will be displayed.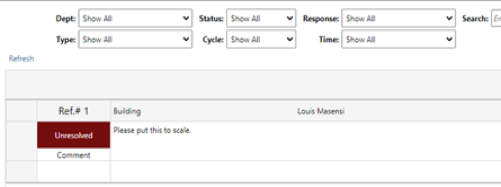
The first column in the list displays the reference number assigned to each comment or changemark, and indicates whether the staff has reviewed any required corrections that you have made to your files. If it displays Unresolved, the issue has not yet been addressed. The second column displays the comments from the reviewer.
After reviewing the comments, go to the Please enter your responses column (far-right of list) and enter a response for each comment in order to keep the process moving forward.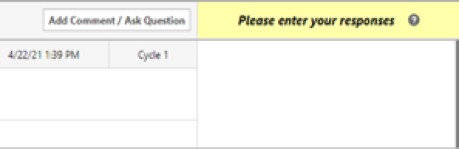
You can view and respond to changemarks in the comments list. Changemarks display the heading Changemark note with a small file image below.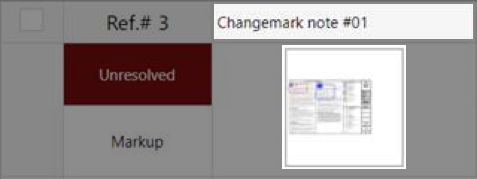
To the right of the Changemark note column, select the file name or click on the file image.![]()
The changemark window is displayed.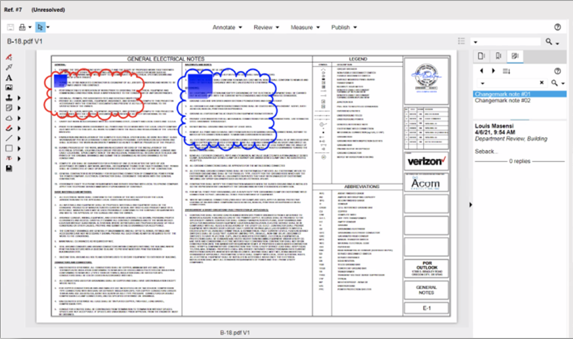
An image of your file with reviewer markup is displayed to the left, and a changemark list is displayed to the right.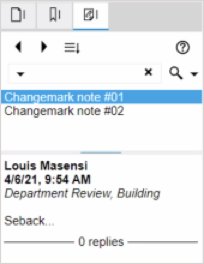
View changemark comments
- To view a changemark comment, do one of the following:
- On the file, in the markup area, hover over
 (blue page icon) to display a pop-up window showing the comment, or
 - In the changemark list, select a changemark to display the comment just below the list.
- On the file, in the markup area, hover over
- To enter a response to a changemark comment:
-
- Select a changemark in the list and, just to the right, enter a response in the Your response box. When finished, click
 , or
, or - Enter a response to a changemark in the comments list (displayed before going to the changemark window), just as you enter regular comments. In the comments list, enter a response in the Please enter your responses column (far-right of list)
- Select a changemark in the list and, just to the right, enter a response in the Your response box. When finished, click
-
- When you are finished viewing the changemarks, select (lower-right corner of window).
The comments list is displayed. - When you are finished viewing comments and changemarks, select
 (upper-right corner of window).
Option: Instead of reviewing and responding to comments and changemarks in Development Direct, you can download them to Excel. In the Step 1 of 4 area, select ![]() . Enter your responses, and then save and close. In the Respond and Resubmit window, select
. Enter your responses, and then save and close. In the Respond and Resubmit window, select ![]() . See the User Guide or more detail.
. See the User Guide or more detail.
Resubmit corrected files
The Step 2 of 4 area allows you to resubmit files that you have corrected and to upload new files.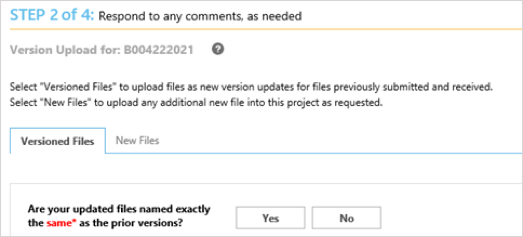
- To upload corrected files, in the Step 2 of 4 area, select Versioned Files.

Upload files with original file name
If you are uploading a corrected file, do not rename it before resubmitting it (for example, adding version number). Once the file is uploaded, it will automatically be assigned a version number .
- Following Are your updated files named exactly the same* as the prior versions, select
 .
. - Select either
 or
or  depending on the file type.
The File Upload window is displayed.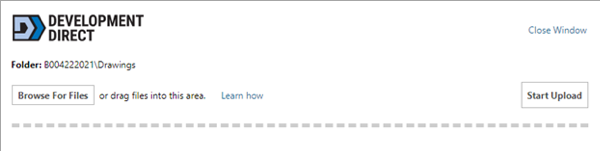
- Select
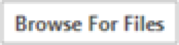 .
.
Option: You can also drag and drop files directly to the window.
The Open dialog box is displayed. - At the left of the dialog box, select the location of your files.
- Select the files to upload and select
 .
.
Note: To select multiple files, hold down Shift or Ctrl as you select them. The selected files are added to the File Upload window. - Repeat as needed to add other files.
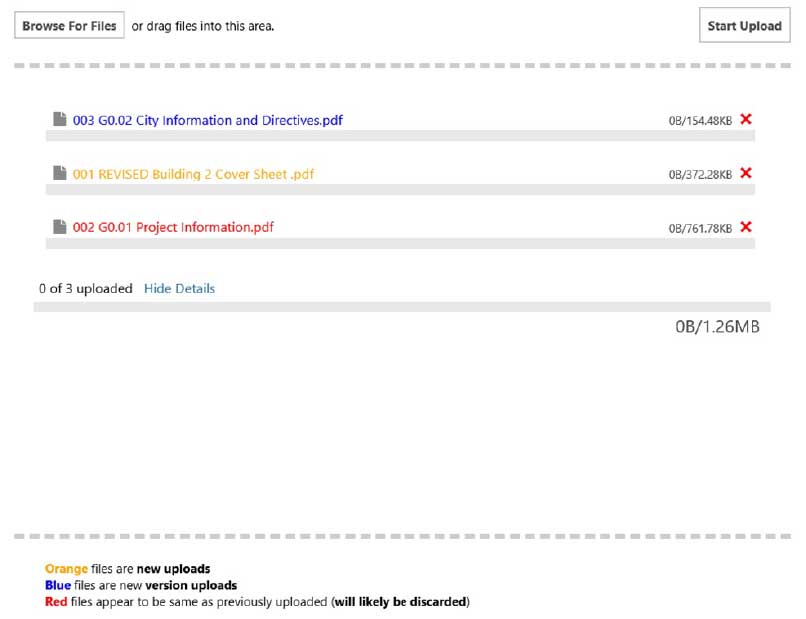
Prior to starting the upload, the color coding on the screen provides a double check of the files you have selected.
- Files noted in blue indicate that a new version of an existing file will be uploaded.
- Files noted in orange are new files that were not previously provided, so they will be uploaded as a separate sheets and will not replace any original files.
- Files noted in red are flagged as duplicates, so they will likely be discarded by staff .
Once you have added all files and checked to make sure they are correct, select ![]() at the top of the dialog box.
at the top of the dialog box.
After upload, a pop-up window is displayed showing that the uploaded files have been added to either the Drawings or Documents folder (displayed at the left of the window), depending on file type.
Upload missing files
- In the STEP 2 of 4 area, select New Files.

- Select either or depending on the type of file to upload.
The File Upload pop-up window is displayed. - Select .
Option: You can also drag and drop files directly from File Explorer to the window.
The Open dialog box is displayed. - At the left of the dialog box, select the location of your files.
- Select the files to upload and select .
Note: To select multiple files, hold down Shift or Ctrl as you select them.
The selected files are added to the File Upload window. - Repeat as needed to add other files.
- When all files have been added, at the top of the dialog box, select
 .
.
A pop-up window is redisplayed. The uploaded files have been added to either the Drawings folder or Documents folder (displayed at the left of the window), depending on their file type.
Confirm responses completed and files uploaded
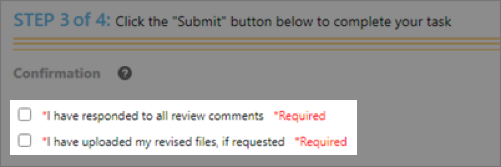
- In the STEP 3 of 4 area, select both check boxes to confirm that you have responded to all comments and uploaded all requested files. (Remember, you will not be allowed to move forward until you respond to each comment.)
- At the bottom of the window, select
 .
. - Your comments and files will be reviewed by staff. The process will be repeated until all issues have been resolved.
When all plan reviews are complete, we will send you a notice that the review is complete and inform you if any final fees are required. Once payment of all fees are verified, you will be able to:
- Download and print your approved plans;
- Begin work, and
- Schedule inspections.
If additional fees are required, you will receive a Final Payment email.
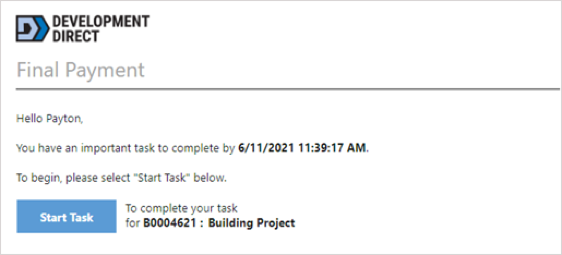
- In the Final Payment email, select , log in to Development Direct and select the ProjectDox banner.
The Tasks list for your project is displayed. - In the TASK column, select Final Payment.
Important Be sure to select the Final Payment task name not the button in the ACTION column.
After selecting the Final Payment task name, the Billing Information window is displayed. You will be prompted through the payment screens.
To learn more about our payment options, see Step 7 above.
129556When all required fees are paid, you will receive a system-generated email and be notified in Development Direct that the permit is approved and your final documents are ready . You may now download and print your files.
(Note: If you do not receive this e-mail within 5 business days of paying and/or cannot access the approved folder on the project, for building permits please contact the permits team at bldservice@clackamas.us or 503-742-4240, for development engineering permits contact engineering@clackamas.us or 503-742-4691, and for septic permits contact soilsconcern@clackamas.us or 503-742-4740.)
Print a color copy of all approved plans, documents, and permits, and be sure to have these documents on-site for inspections. Your plans will be permanently stored in Development Direct, so if they are lost or destroyed you can log in and download them again.
129556There are additional resources to help you begin your project on the Building Codes, Development Engineering and Septic webpages, etc.
Inspections
- Building inspections
Schedule online by using our inspection app or call 503-742-4400 for assistance. - Development Engineering inspections
Follow the instructions on your permit about what inspections are required. If you have requested an inspection and have not received a response within one business day, please contact us at engineering@clackamas.us or 503-742-4691 and reference your permit number. Please request inspections a minimum of 2 business days in advance. - Septic inspections
Schedule online by using our inspection app or call 503-742-4740 for assistance.
Though all Building, Electrical, Mechanical, Plumbing, Site Development, Entrance, Utility and Septic plan reviews and permits are processed through Development Direct, we understand that online services don’t work for everyone. We offer several options to help you keep your project on track if you don’t have access to a computer.
Visit our permit center
At the Development Direct kiosk on the second floor of the Development Services Building, 150 Beavercreek Road, Oregon City, we can help you scan drawings (up to 3 pages, no larger than 11 x 17), upload files, separate, rename and upload PDF files, and navigate online application and payment screens. To use the kiosk, make an appointment and reserve your spot. Making an appointment reserves the kiosk for your use with a staff member and allows us to provide the quality of service that every customer needs and deserves.
Note: Use of the Development Direct kiosk will be prioritized by appointments and staff availability; walk-in use cannot be guaranteed.
Give us a call
Need to know your project status but don’t have a computer? Call us at 503-742-4400 or visit us on the second floor of the Development Services Building at 150 Beavercreek Road in Oregon City.
Development Direct uses a web-based system called ProjectDox, which can be accessed best through Chrome or Firefox without downloading any additional components or software.
When you use Development Direct for the first time, you’ll be prompted to create a new account, even if you already have a ProjectDox account through another jurisdiction.
We do not have an app.
Frequently Asked Questions
The guidelines below will help you prepare the project drawings and documents needed to submit your application.
Drawings are larger format sheets used for construction (for example: site plans, floor plans, detail sheets, general notes). Documents are supplemental information typically in an 8 ½ x 11 format (for example: calculations, product information, reports).
Before you start, it’s important to know.
- All drawings and documents must be PDF files.
- If you need help scanning your drawings, a local print shop may be able to help.
- All drawings and documents must following the naming conventions provided below.
- For drawings, each sheet will be uploaded as a single file.
Drawing requirements
- All drawing must be PDF files, with searchable or vector PDF files preferred.
- Each page or sheet of a drawing file must be uploaded to Development Direct as a separate file
If your drawing is a multi-page PDF file, there are many websites and videos available on the internet to guide you through the steps of splitting your PDF files. Each sheet/page of a drawing must have the page orientation set to landscape.
landscape
portrait- All plans must be drawn to scale, with the scale clearly labeled on the drawing.
Naming conventions for drawing files
All drawing files must follow the naming conventions to ensure that they are listed in the proper order when uploaded. When naming drawings:
- The names are based on the order of the sheets in your drawings set. They must be named and uploaded in this order.
- Please limit the number of characters in a file name to 35 or less; abbreviations are acceptable.
- Do not include dashes (-) or other special characters (such as &, %, #) in the file name.
Important: If you are asked to correct and resubmit a file, do not rename it (for example, add a version number). You must use the original file name or it will not be accepted. Once it is uploaded, the file will automatically be assigned a version number.
The naming convention starts with a number showing the drawing’s position in the overall set of drawings, followed by a description based upon the information provided on the drawing page. For example, if these are the first 3 drawing in your drawing set:
The drawings would be named as follows:
3-digit number showing drawing’s order in the set + (space) + Number and/or letter provided on the sheet + (space) + Sheet Title/Name = File Name
Examples:
- 001 + (space) + S02 + (space) + Foundation = 001 S02 Foundation
- 002 + (space) + S03 + (space) + Floor Plan = 002 S03 Floor Plan
- 003 + (space) + S04 + (space) + Roof Wall Details = 003 S04 Roof Wall Details
Document requirements
- Documents (such as certifications, easement letters, Geotechnical reports, or structural calculations) are project elements that are not drawing files.
- Each document should be uploaded as a separate complete document (multiple page documents are allowed), but not as individual sheets.
- All documents must be PDF files.
Naming conventions for document files
- Document file names should describe the contents of the file. Because they do not need to be in a defined order, you do not need to start the file name with a number.
- Please limit the number of characters in a file name to 35 or less; abbreviations are acceptable.
- Do not include dashes [-] or other special characters (such as &, %, #) in the file name.
Examples:
- Structural Calculations 1234 Main St Project
- Product Information Sheet for Sump Pump
- Existing System Evaluation Report
To apply for a permit and submit documents for review, you need to create an account.
- If you have pop-up blockers turned on, you will need to disable them for the Development Direct website. Doing this will allow the log-in page to appear when you sign in.
- Go to Development Direct and click the “Create Account” button
- Fill in all necessary information and click “Create My Account”
- A pop-up window will open asking for a verification code.
- You will get the verification code via email. Enter this code in the pop-up window and click “continue”
- When done, a message will appear letting you know your account was successfully created
When you are ready to apply for a permit, you must submit a completed application
- Once you have created an account, log in to Development Direct using the email address and password you used to set up your account.
- Please note that the roles assigned to project participants in the application process have specific meanings, with not all roles allowed to do the same tasks. Before starting the application, carefully consider who you assign to serve in the following roles as part of your project:
- Submitter
The submitter is the currently logged in user, who is either the property owner or an authorized representative of the property owner. Septic only - *If an authorized representative is completing the application, a signed Authorizing Representative form will need to be uploaded as part of the submittal. - Applicant
The applicant is the only person who will be notified by email to upload files, who can make payments and who can respond to correction requests during the application review process. - Construction Point of Contact
This person is responsible for answering construction/inspection-related questions after a permit has been issued. (Typically, this is the project contractor).
- Submitter
On the portal page, based upon the type of permit you need, begin applying for a permit by selecting one of the following:
The permits available on Development Direct are listed below.
Building Permits
(plan review required)- Agricultural Exemption
- Building
- Building Permit Revisions
- Electrical
- Manufactured Dwelling
- Mechanical
- Plumbing
Development Engineering Permits
(plan review required)- Development
- Entrance
- Right of Way
- Utility
Septic Submittals
(staff review required)- Authorization Notices
- Site Evaluations
- Construction & Repair Permits
- Existing System Verifications
- Pumper Truck Inspections
Need another type of permit? Check our How To Guide for assistance.
Use the dropdown menu to choose the type of permit or application you need. Assign a project name to your application in the name box.
Note: All project names are limited to 100 characters or less.
When naming the project the following is recommended:
- Building applications
Use the site address, followed by the type of work.
Example: 5607 SE FOREST DR - New Construction. - Development Engineering Applications
Use the project title, plus the description or road name.
Example: Smith Partition — two lots
Example: Smith Partition – Johnson Road - Septic applications
Use the site address followed by the type of work.
Example: 5607 SE FOREST DR – Major Repair Permit
Example: 32E05C 00812 – Site Evaluation
- Building applications
Select
and you will be walked through the application process.Note: While completing the application, watch the section headers on the right side to see if each section is complete or incomplete. If you cannot submit your application, go back and make sure each section is marked as complete.
After your application has been processed, you will receive an Upload and Submit message with a link to upload your project documents in Development Direct.
To help your project move through the process quickly, please make sure that you upload your project drawings and documents correctly.
- Drawing sheets
- Upload into the drawing folder.
Upload in landscape (horizontal) orientation.
landscape
portrait- Upload each sheet as a single file.
- All drawings must be PDF.
- Use the drawing file naming conventions shown in Step 1 above.
- Documents (reports, calculations, etc.)
- Upload into the documents folder.
- Upload all documents as one complete document or packet, not as individual pages.
- Documents must be in a PDF format.
- You must use the document file naming conventions shown in Step #1 above.
- Remember to complete your task when you are done uploading all your drawings and documents.
You may want to allow others to participate in your project (for example, a co-worker, partner or architect). If you choose to do this, you can assign permissions to each individual.
To invite someone as a project participant:
- Select the Invite Others tab located near the top of the Upload and Submit form.
- At Invite to Group, select one of the following:
- Applicant
An Applicant can view previously uploaded files, comment on, and complete tasks.- Note: You can add as many Applicants as you like, but the first applicant to accept a task is the only one who can work on it.
- View Only Applicant
A View Only Applicant can only view previously uploaded files. You can add as many View Only Applicants as you like.
- Applicant
- Enter the name and email address of the individual to invite.
- When finished, select Invite User.
After your files are submitted, our staff will begin the Prescreen Review process to check the drawings and documents provided for the project.
After we review your files, you will receive a system-generated email and be notified in Development Direct about the status of your application.
- If all requirements of the Prescreen Review were met, you will receive a Prescreen Completed email.
- If additional information is needed, you will receive a Prescreen Corrections email. See Step 9 below for how to respond to requests for additional information.
If fees are required for your project, they must be paid before your application is complete. There are 3 ways you can pay fees. (Note: The fastest way to move forward with your permit is to pay through your Development Direct account.)
| Online Payments (Credit/debit card) | We accept credit and debit card payment through Visa, MasterCard and Discover Card. Note: Bank service fees apply when using a credit/debit card.
|
| eCheck | ou can pay online through your Development Direct account with an electronic check (ACH payment). Note: Bank service fees apply when using eChecks. |
| Cash, In-Person Payments | You may pay with cash in-person, from 8 a.m. to 4 p.m., Monday through Thursday, at 150 Beavercreek Road, Oregon City map. Note: You will still need to submit your application materials online. |
Please note:
- Processing of your application will be paused until we receive funds.
- You will receive an email letting you know that the Plan Review process is underway once you have met all the submittal requirements, Prescreen Review is complete, and any necessary fees are paid.
Development Direct will be your go-to place to:
- check the status of your project;
- see if action is required from you to move the application forward, and
- when requested, upload additional items or information needed to complete the review for your project.
Note: You can check the status of your project at any time, but all reviews must be completed by Clackamas County staff for you to respond or upload documents to the system. Receiving a task is an indication that an action or a response is required from you.
To see a list of your projects and the status of each:
- Log in to Development Direct.
- At the bottom of the Clackamas County Development Direct Portal page, select .
The Projects list is displayed. (If you are on the Task tab, you will need to select Projects.) - If you don’t see a particular project, in the lower-right corner of the list, select or .
- The STATUS column indicates where your project is in the review process. You can also view additional status information by selecting the (Project status) button to the left of a project number.
A Status page displays more detailed information. - Option: To see the status of each project task, select at the bottom of the status page. The Plan Review – Workflow Routing Slip report will be displayed. When you are finished viewing the report, select (Close) in the upper-right corner.
- To return to the Projects list, select near the top-center of the page.
Once all staff reviews of your project are complete, you will receive a system-generated email, and you will be notified in Development Direct, if corrections or additional information are required for your project. Required actions will be assigned to you as tasks. The email you receive will contain a link to begin the task.
- To begin the task, select in the email you received and log in to Development Direct; then click the ProjectDox banner. The Tasks list for your project is displayed.
- In the TASK column, select your task.
(Note: Be sure to select the task name in the TASK column, and not the button in the ACTION column.) A pop-up window will be displayed with additional information.
Needed corrections will be identified in the form of a comment or a changemark.
- A comment is a text only remark,
- A changemark is a comment that is placed and marked directly on a drawing (site plan, cut sheet, etc.).
If a comment or changemark is labeled Correction required, it will be assigned to you as a task.
To review these comments: Select the ![]() box in the STEP 1 of 4 area of the pop-up window .
box in the STEP 1 of 4 area of the pop-up window .
After selecting the Review Comments box, the comment list will be displayed.
The first column in the list displays the reference number assigned to each comment or changemark, and indicates whether the staff has reviewed any required corrections that you have made to your files. If it displays Unresolved, the issue has not yet been addressed. The second column displays the comments from the reviewer.
After reviewing the comments, go to the Please enter your responses column (far-right of list) and enter a response for each comment in order to keep the process moving forward.
You can view and respond to changemarks in the comments list. Changemarks display the heading Changemark note with a small file image below.
To the right of the Changemark note column, select the file name or click on the file image.![]()
The changemark window is displayed.
An image of your file with reviewer markup is displayed to the left, and a changemark list is displayed to the right.
View changemark comments
- To view a changemark comment, do one of the following:
- On the file, in the markup area, hover over (blue page icon) to display a pop-up window showing the comment, or
- In the changemark list, select a changemark to display the comment just below the list.
- On the file, in the markup area, hover over
- To enter a response to a changemark comment:
-
- Select a changemark in the list and, just to the right, enter a response in the Your response box. When finished, click , or
- Enter a response to a changemark in the comments list (displayed before going to the changemark window), just as you enter regular comments. In the comments list, enter a response in the Please enter your responses column (far-right of list)
- Select a changemark in the list and, just to the right, enter a response in the Your response box. When finished, click
-
- When you are finished viewing the changemarks, select (lower-right corner of window).
The comments list is displayed. - When you are finished viewing comments and changemarks, select (upper-right corner of window).
Option: Instead of reviewing and responding to comments and changemarks in Development Direct, you can download them to Excel. In the Step 1 of 4 area, select ![]() . Enter your responses, and then save and close. In the Respond and Resubmit window, select
. Enter your responses, and then save and close. In the Respond and Resubmit window, select ![]() . See the User Guide or more detail.
. See the User Guide or more detail.
Resubmit corrected files
The Step 2 of 4 area allows you to resubmit files that you have corrected and to upload new files.
- To upload corrected files, in the Step 2 of 4 area, select Versioned Files.
Upload files with original file name
If you are uploading a corrected file, do not rename it before resubmitting it (for example, adding version number). Once the file is uploaded, it will automatically be assigned a version number .
- Following Are your updated files named exactly the same* as the prior versions, select .
- Select either or depending on the file type.
The File Upload window is displayed. - Select .
Option: You can also drag and drop files directly to the window.
The Open dialog box is displayed. - At the left of the dialog box, select the location of your files.
- Select the files to upload and select .
Note: To select multiple files, hold down Shift or Ctrl as you select them. The selected files are added to the File Upload window. - Repeat as needed to add other files.
Prior to starting the upload, the color coding on the screen provides a double check of the files you have selected.
- Files noted in blue indicate that a new version of an existing file will be uploaded.
- Files noted in orange are new files that were not previously provided, so they will be uploaded as a separate sheets and will not replace any original files.
- Files noted in red are flagged as duplicates, so they will likely be discarded by staff .
Once you have added all files and checked to make sure they are correct, select ![]() at the top of the dialog box.
at the top of the dialog box.
After upload, a pop-up window is displayed showing that the uploaded files have been added to either the Drawings or Documents folder (displayed at the left of the window), depending on file type.
Upload missing files
- In the STEP 2 of 4 area, select New Files.
- Select either or depending on the type of file to upload.
The File Upload pop-up window is displayed. - Select .
Option: You can also drag and drop files directly from File Explorer to the window.
The Open dialog box is displayed. - At the left of the dialog box, select the location of your files.
- Select the files to upload and select .
Note: To select multiple files, hold down Shift or Ctrl as you select them.
The selected files are added to the File Upload window. - Repeat as needed to add other files.
- When all files have been added, at the top of the dialog box, select .
A pop-up window is redisplayed. The uploaded files have been added to either the Drawings folder or Documents folder (displayed at the left of the window), depending on their file type.
Confirm responses completed and files uploaded
- In the STEP 3 of 4 area, select both check boxes to confirm that you have responded to all comments and uploaded all requested files. (Remember, you will not be allowed to move forward until you respond to each comment.)
- At the bottom of the window, select .
- Your comments and files will be reviewed by staff. The process will be repeated until all issues have been resolved.
When all plan reviews are complete, we will send you a notice that the review is complete and inform you if any final fees are required. Once payment of all fees are verified, you will be able to:
- Download and print your approved plans;
- Begin work, and
- Schedule inspections.
If additional fees are required, you will receive a Final Payment email.
- In the Final Payment email, select , log in to Development Direct and select the ProjectDox banner.
The Tasks list for your project is displayed. - In the TASK column, select Final Payment.
Important Be sure to select the Final Payment task name not the button in the ACTION column.
After selecting the Final Payment task name, the Billing Information window is displayed. You will be prompted through the payment screens.
To learn more about our payment options, see Step 7 above.
129556When all required fees are paid, you will receive a system-generated email and be notified in Development Direct that the permit is approved and your final documents are ready . You may now download and print your files.
(Note: If you do not receive this e-mail within 5 business days of paying and/or cannot access the approved folder on the project, for building permits please contact the permits team at bldservice@clackamas.us or 503-742-4240, for development engineering permits contact engineering@clackamas.us or 503-742-4691, and for septic permits contact soilsconcern@clackamas.us or 503-742-4740.)
Print a color copy of all approved plans, documents, and permits, and be sure to have these documents on-site for inspections. Your plans will be permanently stored in Development Direct, so if they are lost or destroyed you can log in and download them again.
129556There are additional resources to help you begin your project on the Building Codes, Development Engineering and Septic webpages, etc.
Inspections
- Building inspections
Schedule online by using our inspection app or call 503-742-4400 for assistance. - Development Engineering inspections
Follow the instructions on your permit about what inspections are required. If you have requested an inspection and have not received a response within one business day, please contact us at engineering@clackamas.us or 503-742-4691 and reference your permit number. Please request inspections a minimum of 2 business days in advance. - Septic inspections
Schedule online by using our inspection app or call 503-742-4740 for assistance.
Though all Building, Electrical, Mechanical, Plumbing, Site Development, Entrance, Utility and Septic plan reviews and permits are processed through Development Direct, we understand that online services don’t work for everyone. We offer several options to help you keep your project on track if you don’t have access to a computer.
Visit our permit center
At the Development Direct kiosk on the second floor of the Development Services Building, 150 Beavercreek Road, Oregon City, we can help you scan drawings (up to 3 pages, no larger than 11 x 17), upload files, separate, rename and upload PDF files, and navigate online application and payment screens. To use the kiosk, make an appointment and reserve your spot. Making an appointment reserves the kiosk for your use with a staff member and allows us to provide the quality of service that every customer needs and deserves.
Note: Use of the Development Direct kiosk will be prioritized by appointments and staff availability; walk-in use cannot be guaranteed.
Give us a call
Need to know your project status but don’t have a computer? Call us at 503-742-4400 or visit us on the second floor of the Development Services Building at 150 Beavercreek Road in Oregon City.
Development Direct uses a web-based system called ProjectDox, which can be accessed best through Chrome or Firefox without downloading any additional components or software.
When you use Development Direct for the first time, you’ll be prompted to create a new account, even if you already have a ProjectDox account through another jurisdiction.
We do not have an app.
Still have questions? Contact us.
Our customer service representatives are available.
 | Call 503-742-4400. We’ll answer in-person during office hours (Monday through Thursday, 8 a.m. to 4 p.m.) or respond to you the next business day if you leave a message outside of office hours. |
 | Email at dtdcustomerInfo@clackamas.us. |
 | Stop by our counter on the second floor of the Development Services Building, 150 Beavercreek Road, Oregon City, during office hours: Monday through Thursday, 8 a.m. to 4 p.m. excluding holidays. |
